
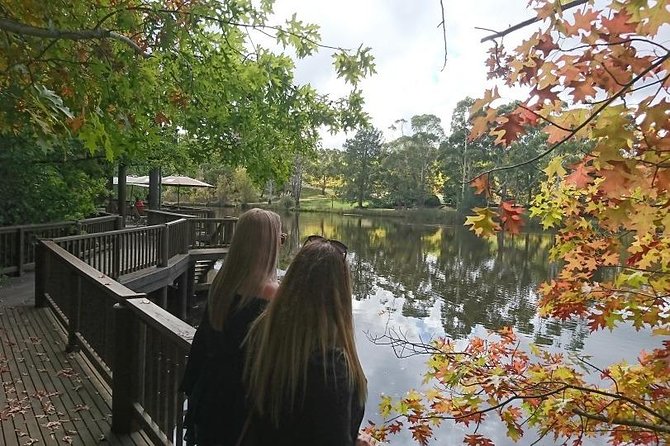
Reviewed · MCLAREN VALE WINE TOURS
d’Arenberg Cube / McLaren Vale Regional Tour
Art and gin in one long day. This d’Arenberg Cube / McLaren Vale Regional Tour mixes standout architecture, serious South Australian drinks, and a short list of stops that actually stays on time. I like how the day spotlights d’Arenberg Cube for its wow-factor and gives you a dedicated Never Never gin and tonic flight, not just a quick sip and run.
The best part is the human scale: the group caps at 6 travelers, so you get time to ask questions (and it helps that the guide I’ve heard about, Roger, is genuinely passionate about wine and the Adelaide area). One consideration: it runs about 6 to 8 hours and includes multiple tastings, so if you prefer a slower pace or you’re not into alcohol-focused stops, you’ll want to manage expectations before you book.
In This Review
- Key points to know before you go
- How This McLaren Vale Regional Tour Fits Together from 8:30 AM
- Coffee First: McLaren Vale and Dawn Patrol’s Vineyard-Adjacent Start
- Oliver’s Taranga Cellar Door: A Friendly, Easygoing Hour to Reset
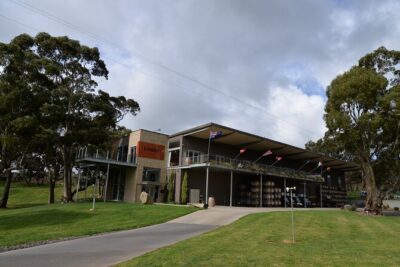
- d’Arenberg Cube: Architecture and Wine in the Same Frame
- Wirra Wirra Wine Tasting + Lunch: Where the Day Breaks for Food
- Never Never Distilling Co.: Gin and Tonic, Built Around Award-Winning Flavor
- Goodieson Brewery Tasting Paddle + Samson Tall Wines
- What Makes the Tour Feel Special: Guide Attention and a 6-Person Max
- Price and Value: What AUD 143 Covers in Real Touring Terms
- Who This Tour Suits Best in McLaren Vale
- Practical Tips for a Smooth, Enjoyable Sea-and-Vines Day
- Should You Book This d’Arenberg Cube / McLaren Vale Regional Tour?
- FAQ
- What time does the tour start?
- How long is the d’Arenberg Cube / McLaren Vale Regional Tour?
- How many people are in the group?
- Is pickup available?
- What’s included in the price?
- Is lunch included?
- What tastings will I do during the day?
- Are there any extra costs at the stops?
- Does the tour require good weather?
- Is it accessible and are service animals allowed?
Key points to know before you go
- Small group touring (max 6) means more back-and-forth with your guide and less time waiting around.
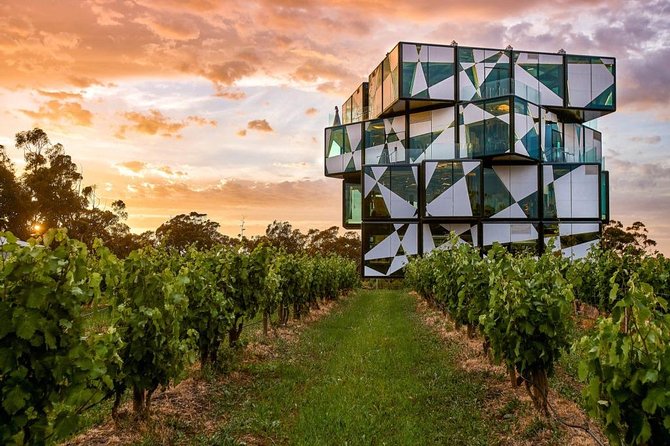
- d’Arenberg Cube is the anchor stop: art and architecture tied directly to a winery visit.
- Never Never Distilling gets its own time slot for a gin tasting built around juniper-forward flavor.
- Wirra Wirra includes a planned lunch booking so your midday doesn’t feel like guesswork.
- You’ll taste across categories: coffee, wine, beer (paddle), and gin in one route.
- Coffee starts the day twice with short, free stops that wake up your palate before the wineries.
Grenache down by the gulf, a few more McLaren Vale days
- Adelaide: Half-day McLaren Vale & Glenelg Wine Tasting Tour★ 4.8 · 417 reviews
- McLaren Vale and Glenelg Wine Tasting and Sightseeing (Half-day Afternoon)★ 5.0 · 369 reviews
- McLaren Vale Winery Small Group Tour with Wine Tasting and Lunch★ 5.0 · 315 reviews
- McLaren Vale Wine Tour by Bike★ 5.0 · 154 reviews
- Private Wine Tours McLaren Vale or Adelaide Hills★ 5.0 · 63 reviews
How This McLaren Vale Regional Tour Fits Together from 8:30 AM
This is a full-day regional loop that starts at 8:30 am and typically runs 6 to 8 hours. You’re on private transportation with WiFi on board, and pickup is offered, which makes it easier than trying to stitch together transfers on your own. The key practical detail: the itinerary is built around time-boxed tastings—most stops land around an hour, with one longer winery block—so you get variety without a lot of dead time.
You also get a tour format that’s ideal for first-timers. McLaren Vale can feel like a choose-your-own-adventure of cellar doors, but this keeps you inside a focused set of places—coffee, three-ish wineries/distilleries, and a beer tasting component—so you don’t have to decide everything yourself.
If you like structure, this kind of route is a win. If you hate being on a schedule, you’ll still likely enjoy it because the group size stays small and the stops are designed as cellar door experiences, not long bus sightseeing.
Coffee First: McLaren Vale and Dawn Patrol’s Vineyard-Adjacent Start
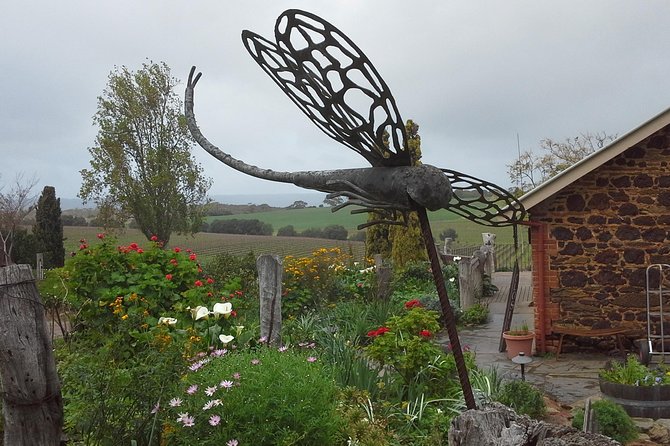
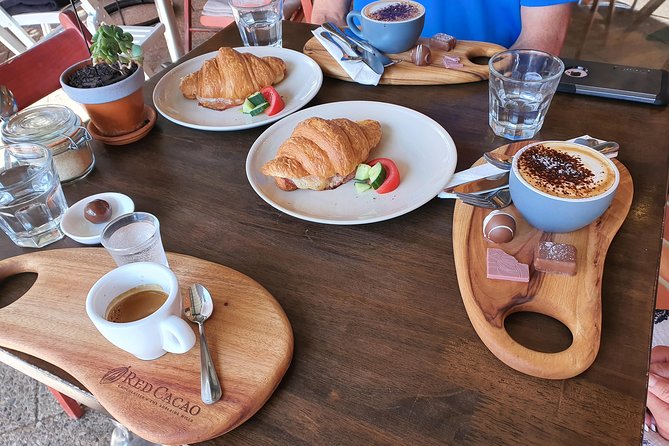
The day kicks off with a 30-minute coffee stop in McLaren Vale, followed by another 30-minute visit at Dawn Patrol Coffee. Both are marked as free admission tickets, which is a nice bonus since it doesn’t add cost early on.
Dawn Patrol is positioned as a specialty roastery experience in the middle of the vineyard scenery. You’re sampling a rotating selection rather than the same pour every day, so the “tasting” part feels more like a guided flavor moment than just grabbing a cup. Even if you’re not a serious coffee person, this is a smart start because it keeps the morning from turning into a straight shift from the car to wine glasses.
Practical note: coffee stops are short. Treat this as palate setup, not a slow brunch. Wear something comfortable for walking between spots, and if caffeine hits you hard, consider pacing your sips.
Oliver’s Taranga Cellar Door: A Friendly, Easygoing Hour to Reset
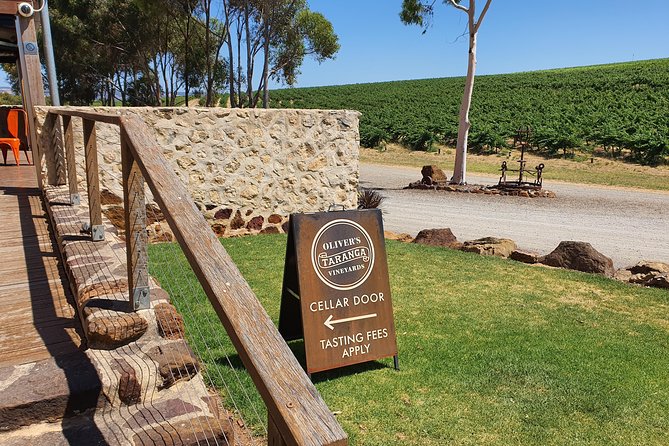
Next up is Oliver’s Taranga Vineyards Cellar Door and Winery for about one hour, with admission and tasting included. This stop is described as a favorite and a “must do” style experience, with time built in to relax and take in the surroundings while you enjoy the tasting.
That matters because some cellar doors are all business. Here, the format sounds more like a calm vineyard break in the middle of a long day. If you’re heading to several wineries back-to-back, an hour where you can slow down a bit can make the later stops feel more enjoyable instead of rushed.
What to expect from a practical standpoint: you’ll likely get a guided tasting flow, and you’ll have time to compare bottles and styles. Since the tour keeps your day tight, I’d plan on using this stop to ask your guide what to prioritize later based on what you liked in the glass.
d’Arenberg Cube: Architecture and Wine in the Same Frame
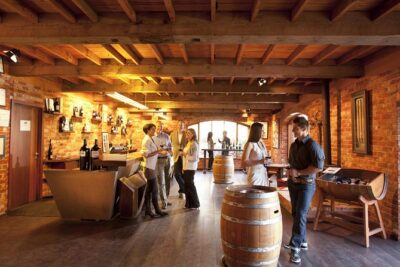
Then comes the headline stop: d’Arenberg Cube Winery. You spend about one hour here, with venue entry and tasting included. The appeal is obvious from the way the tour frames it: you’re not visiting a “typical” winery building. You’re there for the artwork and architecture first, then the wine program that goes with it.
This is one of those places where the building experience and the tasting experience reinforce each other. Even if you’re not an art critic, the point is that the winery experience feels designed, not accidental. That’s the value for a visitor—especially if you’ve never been to McLaren Vale before—because it gives you a clear memory of the region beyond the taste.
Possible drawback: it’s one of the stops you should treat as your “attention hour.” If you’re trying to multitask, take phone calls, or spend the whole hour scanning menus with no listening, you’ll miss what makes the Cube special. The best plan is to set aside your full attention for this one stop, then let the rest of the day be more casual.
Wirra Wirra Wine Tasting + Lunch: Where the Day Breaks for Food
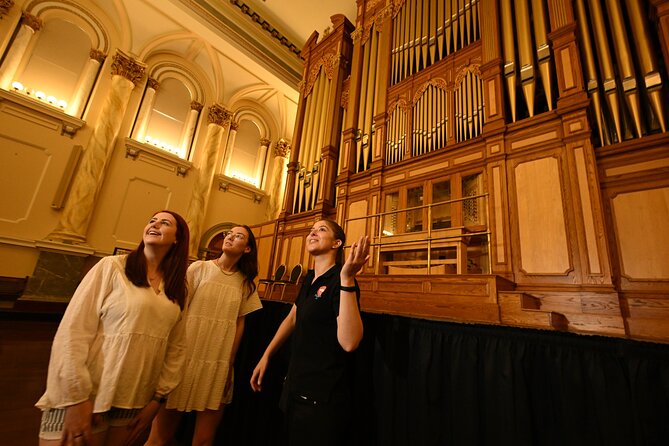
After d’Arenberg, you move to Wirra Wirra Vineyards for about two hours, with wine tasting included. The description highlights a cellar door set among the vineyards with views to the Willunga escarpment, which is part of why this stop works so well as your midday anchor.
Lunch is included as a lunch booking at Wirra Wirra (Harry’s Deli). This is important for value because it stops you from having to hunt for food between cellar doors. At the same time, the tour notes that lunch and drinks at Wirra Wirra may be at your own cost, so think of the included piece as the lunch booking rather than a full buffet of alcohol. If you want a couple of drinks with lunch, keep an extra budget handy.
Two hours gives you enough time to:
- taste through the wine selection without being frantic
- eat something properly, not just snack your way through the afternoon
- reset before you head into gin and beer territory
If you’re the type who gets tired of heavy tastings, use lunch to slow down and choose one or two wines you genuinely want to remember, rather than tasting everything just because it’s there.
Never Never Distilling Co.: Gin and Tonic, Built Around Award-Winning Flavor
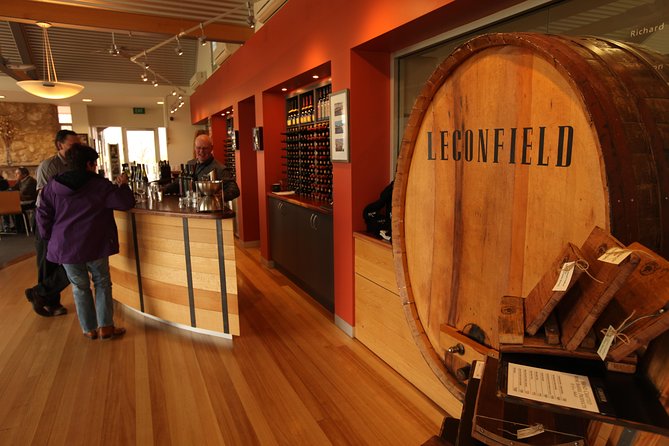
Never Never Distilling Co. is the gin-focused stop, lasting about one hour with tasting included. The distillery is noted as founded in 2016 and described as producing Australia’s most highly awarded gins. This isn’t a vague claim—the tour’s format is a structured tasting where the focus is on bold juniper flavor and the way their gin tastes when paired in a gin and tonic style flight.
What you can expect, practically:
- a guided explanation of what makes their range tick
- tasting multiple pours so you can compare styles
- a more playful feel than some wineries, since gin tastings are often built around flavor profiling and mixing concepts
If you’re a gin person, this will be your favorite stop. If you’re not, it’s still a useful palate change because gin tasting sits in a different flavor world than wine—herbal, juniper-driven, and often brighter.
One consideration: because this is an alcohol-forward segment, it can be easier to overdo it. If you’re aiming to enjoy the last stops, pace yourself here and don’t feel pressured to match every pour with a full second sip. Your guide will generally steer you, but you’re still the one driving your own comfort.
Goodieson Brewery Tasting Paddle + Samson Tall Wines
This tour includes a Goodieson Brewery tasting paddle of beers. A paddle is a smart format because you get range without committing to one heavy beer. The tour also notes that additional beer tasting or casual drinks at Goodieson Brewery may cost extra (listed as A$15 per person). So treat the paddle as the main experience and budget separately if you want extra drinks after.
Then there’s Samson Tall Wines for about one hour, with tasting included. This stop is presented as more than wine tasting: it includes history, heritage grape varieties, and local art, with vineyards and lawns for unwinding. That combination matters because not every stop is just about liquid. If you like your cellar doors to include stories, this one gives you a sense of place beyond flavor.
Practical expectation: Samson Tall is likely a more comfortable, slower-feeling stop than a tight tasting room. You may find it a good place to ask your guide for wrap-up recommendations—what to buy if you enjoyed the more intense wines, or what to look for if you preferred lighter styles.
What Makes the Tour Feel Special: Guide Attention and a 6-Person Max
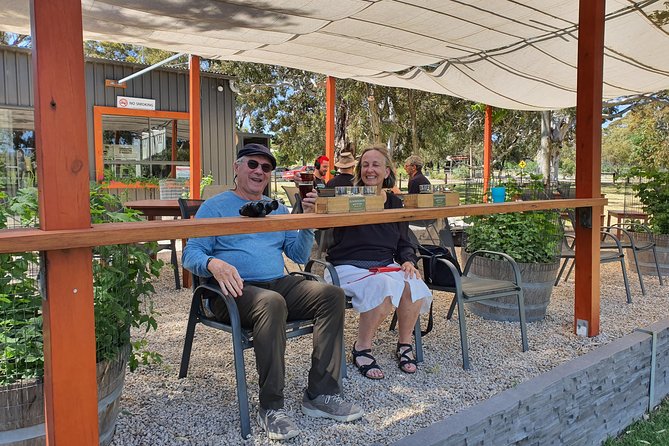
The most reliable quality indicator in this tour’s reviews is the guide experience. One write-up specifically called out Roger as extremely passionate about wine and Adelaide, and that’s exactly what small-group touring buys you. When the group is capped at 6, the guide can explain differences between wines and spirits without repeating themselves over and over for a crowd.
Here’s what that means for your day, in plain terms:
- You can ask a question after your first tasting, not after the last stop.
- You’re more likely to get guidance based on what you actually like.
- You’ll have less waiting around, because there are fewer people to coordinate.
It also makes the day less stressful. Instead of trying to decode menus and labels in a hurry, you get a running conversation where the day’s tastings become a story you can follow.
If you get value from that kind of guidance, this tour is built to match your style.
Price and Value: What AUD 143 Covers in Real Touring Terms
At $143, you’re paying for a long, guided loop with a lot of “paid-for-once” components. Here’s what that value looks like in real travel terms:
Included pieces (based on the tour info) include:
- private transportation with WiFi
- coffee stops (McLaren Vale and Dawn Patrol)
- Olivers Taranga tasting (included)
- d’Arenberg Cube entry and tasting
- Wirra Wirra wine tasting plus a lunch booking at Harry’s Deli
- Never Never Distilling gin tasting
- Goodieson Brewery tasting paddle of beers
- Samson Tall tasting
That’s a lot of destination time bundled together. If you were to book each cellar door separately and manage transfers yourself, the cost can quickly climb, and the scheduling headache can take the fun out of it. This tour’s advantage is that it removes the logistics friction. You show up, you go step by step, and you don’t have to plan a route across a spread-out region.
The one “watch your wallet” area is that additional drinks at certain stops and any extra items at lunch can be on your own cost. But the core tasting program is clearly designed to be included, which is the big value driver.
For the type of traveler who wants variety in one day, the price is easier to justify than a single-venue tour.
Who This Tour Suits Best in McLaren Vale
This is a strong fit if you:
- want a first-time introduction to McLaren Vale without building your own schedule
- like drinking experiences that are structured—coffee, wine, gin, beer—rather than random stops
- enjoy art and architecture as part of the visit, not just a backdrop
- prefer small-group attention over a bus full of people
It may be less ideal if you:
- don’t want a tasting-heavy day (multiple alcohol-focused venues are part of the design)
- hate spending long stretches on set schedules
- want totally free-form time at each stop
The good news is that most travelers can participate and service animals are allowed, so it’s generally built for a broad range of visitors. Still, if alcohol is a no-go for you, you’ll want to think carefully because the day’s core activities revolve around tastings.
Practical Tips for a Smooth, Enjoyable Sea-and-Vines Day
McLaren Vale touring is easy when you set yourself up right.
- Plan on comfort over style: you’ll likely walk a bit between cellar door areas and seating spots.
- Take a water break when you can. The day includes multiple tastings, so don’t treat everything like a nonstop sampler.
- Eat at lunch with intention. The Wirra Wirra lunch booking gives you a good anchor, so use it to keep your energy steady for the afternoon.
- Keep your expectations tuned: this is not just scenery. It’s a tasting itinerary with an intentional sequence of flavors.
- Weather matters. The tour requires good weather, so dress for sun but be ready for cool morning air if needed.
Also, since WiFi is on board and the tour uses a mobile ticket, it’s easy to stay organized during the day. Just don’t let your phone replace your attention at the d’Arenberg stop, where the visual experience is a big part of the point.
Should You Book This d’Arenberg Cube / McLaren Vale Regional Tour?
If you want a packed but not chaotic day—wine, gin, beer, and coffee in a small group—this tour is a smart bet. It’s built around memorable stops like d’Arenberg Cube and gives the gin tasting the time it deserves at Never Never Distilling Co. Add a planned lunch at Wirra Wirra (Harry’s Deli booking) and the day feels balanced instead of purely drink-focused.
I’d book it if you enjoy guided tastings and you like having a route that handles the logistics. I’d skip or look for an alternative if you’d rather pick one or two venues and linger, or if alcohol-focused tasting isn’t your thing.
FAQ
What time does the tour start?
The tour start time is listed as 8:30 am.
How long is the d’Arenberg Cube / McLaren Vale Regional Tour?
It runs about 6 to 8 hours.
How many people are in the group?
This tour has a maximum of 6 travelers.
Is pickup available?
Pickup is offered.
What’s included in the price?
The tour includes private transportation, WiFi on board, coffee stops at Dawn Patrol (and the earlier coffee stop in McLaren Vale), tastings at Olivers Taranga, d’Arenberg Cube Winery, Wirra Wirra, Never Never Distilling, a Goodieson Brewery tasting paddle, and lunch booking at Wirra Wirra (Harry’s Deli).
Is lunch included?
A lunch booking at Wirra Wirra (Harry’s Deli) is included, but the tour notes that lunch and drinks at Wirra Wirra may be at your own cost.
What tastings will I do during the day?
You’ll do tastings that include wine at multiple venues, a gin and tonic tasting flight at Never Never Distilling Co., and a beer tasting paddle at Goodieson Brewery. Coffee is also part of the morning stops.
Are there any extra costs at the stops?
The tour notes additional casual drinks at Goodieson Brewery may cost extra, and lunch and drinks at Wirra Wirra may be at your own cost.
Does the tour require good weather?
Yes, the experience requires good weather. If canceled due to poor weather, it offers a different date or a full refund.
Is it accessible and are service animals allowed?
Service animals are allowed, the tour is near public transportation, and most travelers can participate.
More Tours in Adelaide
- Barossa Premium Wine Tasting Tour & lunch Departs 7 days a week
★ 5.0 · 1,475 reviews - Adelaide: Barossa Premium Wine Tasting tour & Winery Lunch
★ 4.8 · 1,452 reviews - Adelaide Oval Stadium Guided Tour
★ 4.8 · 760 reviews - Kangaroo Island in a Day Tour from Adelaide
★ 4.5 · 722 reviews - Adelaide: Dolphin Sanctuary Eco Kayaking Tour
★ 4.5 · 560 reviews
More Tour Reviews in Adelaide
- Barossa Premium Wine Tasting Tour & lunch Departs 7 days a week
★ 5.0 · 1,475 reviews - Adelaide: Barossa Premium Wine Tasting tour & Winery Lunch
★ 4.8 · 1,452 reviews - Discover Barossa: 4 Wine Tastings, Gourmet Lunch, and Hidden Gems
★ 5.0 · 1,027 reviews - Adelaide: River Torrens Popeye Sightseeing Cruise
★ 4.6 · 949 reviews - From Adelaide: Barossa to Hahndorf Wine Tasting and Lunch
★ 4.6 · 877 reviews
McLaren Vale by the Glass
- Adelaide: Half-day McLaren Vale & Glenelg Wine Tasting Tour
★ 4.8 · 417 reviews - McLaren Vale and Glenelg Wine Tasting and Sightseeing (Half-day Afternoon)
★ 5.0 · 369 reviews - McLaren Vale Winery Small Group Tour with Wine Tasting and Lunch
★ 5.0 · 315 reviews - McLaren Vale Wine Tour by Bike
★ 5.0 · 154 reviews - Private Wine Tours McLaren Vale or Adelaide Hills
★ 5.0 · 63 reviews
Just Added: Fresh Adelaide Reviews

McLaren Vale Wine Tours, compared.
 ★ 4.8Half-day McLaren Vale & Glenelg Wine Tasting TourFrom $63417 reviews
 ★ 5.0McLaren Vale and Glenelg Wine Tasting and Sightseeing (Half-day Afternoon)From $63369 reviews
 ★ 5.0McLaren Vale Winery Small Group Tour with Wine Tasting and LunchFrom $175315 reviews
 ★ 5.0McLaren Vale North Hop-On Hop-Off Wine TourFrom $71251 reviews
 ★ 5.0McLaren Vale Wine Tour by BikeFrom $142154 reviews
 ★ 5.0McLaren Vale Small Group Wine TourFrom $161130 reviews
 ★ 4.9McLaren Vale: Small Group Wine Tour (Includes Lunch)From $138119 reviews
 ★ 5.0Luke’s McLaren Vale Wine TourFrom $8976 reviews
Browse the lists this tour appears in